 |
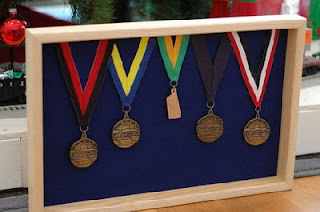
| shadow box |
According to Barton, to display your military or athletic medals, you could use a shadow box. No argument there. Of course, since this was (originally) at eHow, Misty blithely informed her readers that,
"Custom shadow boxes can be ordered through framing companies, or can be built from a few simple woodworking supplies."
What she meant by "woodworking supplies" seemed a little iffy, but that pales alongside most of the rest of Misty's verbiage. We think she was providing instructions for (what she thought would be) a 8½" by 11" shadow box, but her grasp of the materials (and tools) left something to be desired. Here's the first clue she was out of her depth, her first two steps:
- "Cut two lengths of 1-inch by 2-inch lumber 12 inches long, and two lengths nine inches long, using a skill saw."
- "Square the ends of each piece using the miter box and a hand saw. The finished length of the 12-inch pieces should be 11 inches. The finished length of the 9-inch pieces should be 8 1/2 inches."
Why Barton didn't go straight to the finished lengths is beyond our ken. Then again, this is a freelancer who thought that you could assemble two 11-inch and two 8½-inch boards into a frame for which,
"...an 8 1/2-inch by 11-inch rectangle [of] 1/4-inch plywood [would] be the back of the shadow box."
Really? According to our experience (which we guarantee is hella more than Misty's), any rectangular frame built with those boards would be either 12½ x 8½ or 11 x 10. But, then, we know that 1-by-2s are ¾ inch thick. So said "back" ain't gonna fit. That's not all, though, since Misty also said to,
"Cut a rectangle of corkboard 8 1/2 inches by 11 inches. Use the craft knife to shave away at the edges until it just slides snugly into the frame."
Remember the frame dimensions we cited above? Well, the interior dimensions of those two frame would be 11 by 7 or 9½ by 8½, respectively; because the sides have thickness. That ain't a "shave," it's a buzz cut.
When it comes to assembling the pieces, Barton said to use a staple gun (presumably from her desk drawer). She made no mention of filling the holes before her readers were to,
"Stain and varnish the frame to give it a finished look..."
It's been our experience that employing a little wood filler and some sandpaper would help a lot with that "finished look."
Barton's so-called references had no plans, only a picture (that cited a rabbet for the back) of a mitered frame assembled with brads, and a post from a self-styled "domestic goddess" who said to buy the little boxes. Small wonder our Dumbass of the Day had no idea that her instructions were well-nigh useless.
DDIY - WOODWORKING
No comments:
Post a Comment