 |
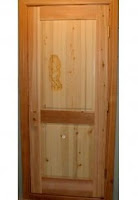
| cedar sauna door |
As is often the case with eHow.com content ported to HomeSteady by Leaf Group, Salo's "things you'll need" list disappeared in the move. It wasn't until we read through that list that we truly understood the depths of Brandon's ignorance.
Salo plucked the line "A standard size sauna door measures 24"x72" from one of his alleged references, while learning that "[a] particular door is made from solid cedar 2 x 4's" from second. He combined those factoids to create the following materials list:
- "Four 2-by-6-by-68-inch cedar boards"
- "Two 2-by-2-by-24-inch cedar boards"
According to Brandon's instructions, you lay the 68-inch 2-by-6s side by side and slap a 24-inch 2-by-4 on each end (lying flat, we guess, although he never actually said that). Screw everything together with pairs of 3-inch screws and, according to Salo, you've got your 24-by-72 door. What Brandon forgot (or never knew) is that dimensional lumber is actually smaller than the nominal size, so his four 2-by-6s make a slab 22" wide and slapping on a 2-by-4 on each end makes the slab 71 inches long with the ends overhanging by an inch on each side. Duh.
Salo got hung up on the factoid that it's not wise to use a metal handle, which he expanded to the somewhat overblown,
"The only metal involved with the construction of these doors is the screws used to hold it together."
Well, Brandon, maybe there should also be hinges, too... As for a wooden handle, Salo's rather confusing instructions are to,
"Lay [an 8-inch 2-by-6] flat and horizontal. Notch out a 4-inch long by 3-inch deep section of this board with your handsaw, chisel and hammer."
That's gonna be fun... Maybe a jigsaw or bandsaw would be easier to use? Or buy one at The River? And then there's this rather strange set of instructions:
"Stand the 8-inch board on its 8-inch edge so the notch is facing the ground. Drill a 3/8-inch hole that is 3 inches deep on the top 8-inch edge, so it is 1/2-inch away from the end of the board. Drill another hole in the same manner at the opposite end of the board... Screw through the holes with the 4-inch screws and into the door."
It looks as though Brandon was attempting to describe a countersunk screw, but who knows? Whatever the case, his handles would need a lot more shaping to keep them from looking like something created by a kindergartner with a hatchet... And finally, he wanted his readers to use "Two 3-inch hinges with screws" and,
"Screw your half hinges to the door and the other half hinges to the door frame."
We'd probably advise something more robust than 3-inch hinges, not to mention suggesting that you mortise the hinges into the door and frame... but what do we know [rhetorical: a lot more than Brandon].
We're left with someone who knew little or nothing about the task at hand and the materials that wpuld be used, yet still had the chutzpah to concoct some "instructions" for this project. We like to award people like that our Dumbass of the Day. In Salo's case, he's a three-time winner...
DDIY - WOODWORKING
No comments:
Post a Comment